What is the Best Drywall Corner Tool and Corner Trowel?
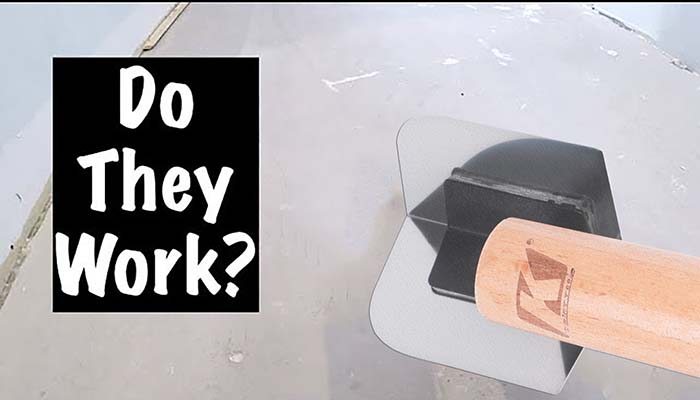
When you are plastering a room or putting up drywall, one of the hardest and most frustrating bits to get done can be the corners – especially the hard-to-reach ones.
And typically, it is the first bit of plastering in a room that needs to be right, in order for it to look like a good job. It's important to have a smooth, sharp corner inside and outside the wall, so it's a good idea to use a corner trowel to achieve this.
The Benefits of Using a Corner Trowel
What is Corner Trowel?
A corner trowel is a type of specialized tool that can be used to spread mulch, remove weeds and plant bulbs, to lay mortar in wall corners. They are shaped like a triangle with a sharp edge on one side and a flat end on the other. It features an L-shaped end that allows the user to apply mortar into tight corners, or against obstacles where it would be difficult or impossible to properly apply the product with the standard trowel.
For many newbies and veterans, they still don't know Corner Trowel. Many benefits of using a Corner Trowel (Drywall Corner Finisher) - You can save time by getting your corner right the first time. It can also mean you have to go over the same spot fewer times and when hard to reach corners are involved there’s less chance of you having a sore arm at the end.
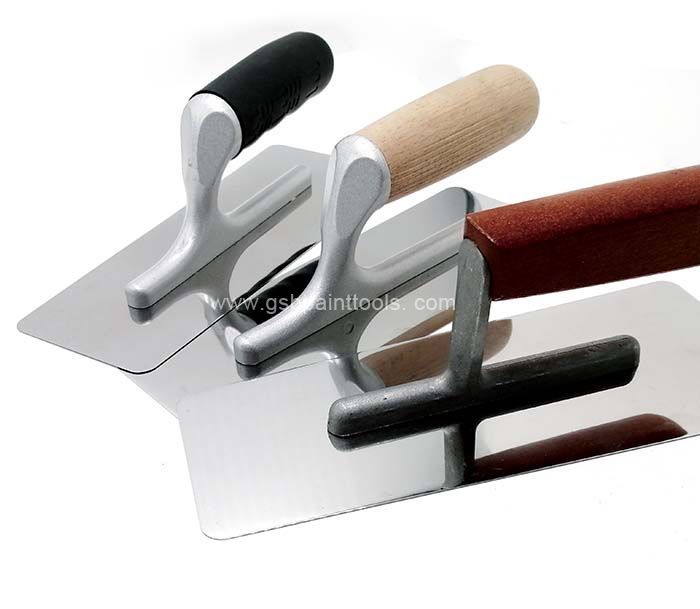
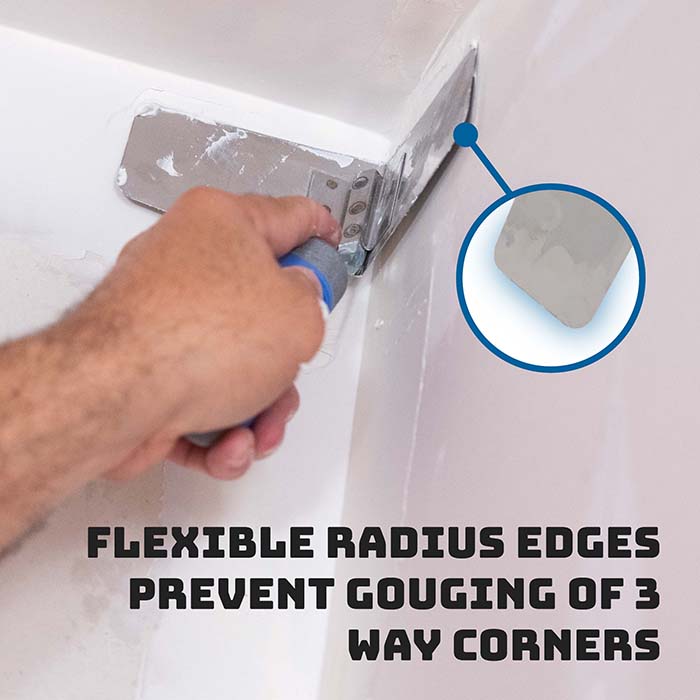
As a handheld device, it fits perfectly into corners, making it the ideal tool to enable flatter, smoother surfaces in the end. While most corners will be 90-degrees, these corner trowels can also come as an adjustable tool or in a variety of sizes to ensure it fits whichever angle you’re going for.
Many also have a soft grip handle to go easy on your hands and the blade can be made of stainless steel and rust-resistant to ensure long-lasting use. Although there are some good products on the market, but hard to find good suppliers of corner trowel.
Our goal is to finish the job faster. For years, plasterers have debated whether they need a corner trowel when finishing corners, but one thing remains certain. If used properly, with the correct amount of pressure applied, a corner trowel will help you finish the job faster, leaving better results in the end. Additionally, it'll leave you less achy and sore afterward because getting those corners right is less of a struggle.
Also, a corner trowel comes in handy if you're taping corner joints when putting up drywall. After you’ve used the drywall knife to apply the mud to your corners, all you need to do is measure a piece of drywall tape that’s the length of the wall and fold it in half.
Apply the drywall tape fold to the corner and press it tightly to the wall, squeezing out any excess mud. Making sure you squeeze out the excess mud will reduce the bubbles and help the compound to dry faster. When flattening the tape and removing any excess mud, you just run the trowel down the corner, from top to bottom, using moderate pressure. You can then smooth a layer of mud over the top using the trowel again.
3 Benefits of Using a Corner Trowel
No matter if you are plastering a wall or putting up drywall, one of the most frustrating parts is trying to reach the corners. Smooth, sharp and correctly plastered corners set up the finish for the entire wall, so it is crucial to get it right and use the right tools to achieve this. A corner trowel is worth its weight in gold when it comes to these tricky to tackle areas of plastering, and is a tool every respectable plasterer should have in his or her kit. We've been taking a closer look at the benefits of corner trowels.
1: Finish Faster
Getting the job done to the same high quality but in less time is every tradesman's dream, which is why automated tools and targeted area tools sell like hot cakes. Learning how to use a corner trowel is essential for faster finishing, but once you have mastered it and apply the right amount of pressure you will see flawless finishing in half the time.
2: Tackles the Hard to reach
As touched on above, tackling the hard-to-reach corners and areas is every plasterer pet peeve, but with a corner trowel you can reduce your frustrations thanks to the angles on the tool provided that will make it much easier to tackle those hard-to-reach places with ease.
3: A Multi-Functional Tool
You may be wondering if a corner trowel is worthy of the investment when it seems the only function is easing corner plastering. It can also be useful when you are trying to tape a joint when drywalling. Apply the drywall tape fold to the corner and press it tightly to the wall, squeezing out any excess mud. Making sure you squeeze out the excess mud will reduce the bubbles and help the compound to dry faster.
With moderate pressure you just run the trowel down the corner, from top to bottom, flattening the tape and removing any excess mud as you go. You can then smooth a layer of mud over the top using the trowel again. We know that, the high-quality of Inside Square Corner Trowel is made of stainless steel with a steel mounting.
It is designed for use with concrete and cement and will form inside square corners wherever these are required, such as on steps. So that, we love these trowels, good quality product at an excellent price. Flexible stainless-steel blade, flexes for perfect 90° corners and handle for extreme comfort.
How to Use a Corner Trowel?
To Use a Corner Trowel, you should hold it in your hand with your thumb pointing down towards the ground and then drag it across where you want to work. The pointy edge will help loosen up any dirt while the flat edge helps scoop out weeds or soil from hard-to-reach places.
Step-by-Step below show how to use a corner trowel properly:
1. Ensure that the wall is firm and dry before applying tile setting material. The best time of year to set tile is during spring or fall when humidity levels are low.
2. Begin by measuring the wall and marking a reference point.
3. Mix your tile setting material according to manufacturer recommendations. Once mixed, use a grout bag or bucket to fill the corner trowel with the mortar product of choice.
4. Position yourself at one end of the corner and place the corner trowel up against it.
5. While applying even pressure with your dominant hand, use the trowel to scoop mortar out of the corner. Apply enough material so it begins to pile higher than the height of the trowel.
6. With your free hand, apply a thin layer of mortar along the wall using either your mud knife or pointing trowel.
7. Hold the corner trowel at a 45-degrees angle from the wall, and use it to scoop mortar from the pile on the floor. Apply pressure with your dominant hand while you pull up and press into position with the corner trowel.
8. Smooth surface of mortar into place using your pointing trowel or mud knife. Allow the mortar to completely dry before proceeding with your project.
In the end, we conclude that corner trowels are useful for planting small plants such as tulips or daffodils close together without damaging their roots too much. It can also be effective when trying to apply mortar in small areas, such as under sinks or between cabinets.
How can I finish drywall inside corners correctly?
A drywall worker named Thomas from Brazil, who is definitely a novice when it comes to finishing drywall. Thomas has done loads of patching, which doesn't typically require working with corners. This time, however, he is doing it the whole room.
After watching a few YouTube or Vimeo videos and reading a few articles online, he learned how to properly finish inside corners. Everybody makes it look so complicated, but he just can't seem to get the hang of it.
The process goes something like this:
1. Put some drywall compound on each side of the corner.
2. Fold the paper tape in half.
3. Press the tape into the mud.
4. Place a corner trowel in the corner, and with gentle pressure on the back of the trowel draw it down (or up) the corner.
5. The first problem I was running into, was that instead of the trowel sliding along the tape. The tape was being pushed along by the trowel, and it would bunch up and be removed from the corner. I solved this by pressing a bit more gently, and holding the tape in place just to get started.
The next problem Thomas ran into was that while he slid the trowel down the corner, the tape would ripple and bunch up ahead of the trowel. To fix this, he had to use my tapping knife to smooth the wrinkles out of the tape. While this worked in the long run, it seemed less than ideal. This extra step was never mentioned in any of the videos or articles, which made him wonder what he was doing wrong.
Question of Thomas: Am I adding too much (or not enough) compound to the corner? Applying too much pressure with the trowel? Or do I just need to work on my technique?
I'm interested in what a more professional opinion there is on this. I am preparing to mud a whole room for the first time, but I've only ever used the fiberglass mesh instead of true paper tape. Maybe it's related to the tackiness/lack thereof of Thomas' compound?
I have watched some drywall guys and have a much lengthier adaptation to what they do. Note: Thomas' drywall mud should have the consistency of a very oily peanut butter. The premixed stuff in buckets at big box is too thick. Add a little water and a couple of drops of Dawn to it. If it is too-dry you may find more air pockets and your tape not binding well with wall. But if too-wet your tape will tear when trying to squeeze of the mud.
They don't use a corner knife and either do I. I find that I end up moving the paper or ripping it. To apply the layer of mud before the tape I either use a 2-in drywall knife vertically or a much larger knife in horizontal swipes. And this next tip is definitely stolen and the key - scrape off the excess mud with a 10-16" knife. The putty knife is flat against the wall so this should make you scrape until your corners are 90 degrees. Most/all corners dip in due to screwing.
If you do this just right you will leave a very thin strip of excess mud down the middle which is fine. The goal is that your mud should be 2-3 inches out of corner all the way down both sides. Fold tape in half and start from top. Press corner tape firmly into corner but do not push hard. Go all the way down just using your finger. Cut tape to size.
With larger knife (10" and up) start at top. Put knife in corner and lightly press out horizontal on tape with a horizontal/down motion (obviously the very top is more horizontal). Do a couple swipe on one side of the corner tape and then do the other side and work your way down.
Excess mud should come out during step 4. If there is a ton then step 2 was done incorrectly. If too much mud your tape may get to wet and rip. If you find yourself in this situation it is much easier to remove tape and start with step 2.
To remove the small excess-mud take a 6" knife (or bigger if you are more skilled) and start at the top corner on one side and swipe from top to bottom. I have seen my pros do this in one swipe. You will have more pressure on the knife towards the corner but not so much that you tear or move tape. The excess mud is good/fine and it should be thicker right now so the tape binds to wall well.
Given you aren't just doing inside corners (and always try to do inside corners first) go back to this corner about 30 mins, maybe an hour. It should be kind of dry - if it still looks sopping wet don't touch it. Put your first coat of mud over the tape on one side of the corner. Use a 4"-6" knife. The key to this coat is that it should be flat. Instinct is that you would have more mud in your corner and smooth down to flat wall. No. Your corner should not be built up and you shouldn't be worried about smoothing to drywall until at least the next coat....and this is where I really diverge from my pros.
I wait 1-2 days depending on type of mud and room conditions. I want everything 90% dry. If I put the first coat of the other side of the corner on. I would certainly mess up the opposite side. My pros do these at the same time, hardly ever mark the other side and when they do that, they don't spend 20 mins trying to fix it like I do. Again, this is a 4-6" knife done flat. So that, to recap we put our tape down and first outer coat on just one side in day one and day 2-3 we will do the other side.
Again, differing from my pros. Here my pros would bust out a 12-16" knife put a crapload of mud in the corner and it would look perfectly feathered in 2-3 mins a corner. Also, it would take very little sanding after. I have no ability to do this so I bust out an 8-10" knife and put my second top coat on.
Scrape any bumps or ridges with 6-inch putty knife after step 8-9 dries. Probably a day later unless using quick set. Put down finish coat with 12-16" knife, and any bumps or ridges with same knife a day later, sand with 120-grit. Finish sand with 240+grit.
Tell yourself that because it took longer it is better [Even though I see far more pinholes in my finish than my pros - they are obviously cheating]. Actually, the pros method that I have seen actually does take as long technically because their top coat is so heavy that they often have to wait 3 days to sand it. Now they would say but we only had to work on it twice vs. my 4-5 times but that is semantics. Both done on the same day.
Being said aside from the consistency of the mud, the things that we have found for inside corners are: Make sure that the mud is evenly applied on both walls (uniform thickness on both walls and smooth) and has no bubbles. It's easier to under apply mud than over apply it.
Apply the mud with a 4-6inch knife, and smooth it with your corner trowel. When putting the tape in the corner, put some tension on the tape. This may be what you're doing wrong. Press the tape in gently with a 4-6inch knife. For the first two feet or so, hold the tape in place at the top as you work the corner trowel downward.
Don't use a corner trowel to set the tape - the extra surface contact, and the pressure required, drags it out and through the joint. A corner trowel cannot be used effectively, as the sole tool in a corner - period. They are typically, only 4" wide, from corner to edge, and are intended for the finish stroke, that defines the corner - not the stroke that sets the tape in the mud.
Only use the corner trowel to level out your "bed" for the tape, and the finish stroke, to define your corner. You must still use a flat knife (normally a 6") to put the mud on the wall, set the tape, and feather the ridge left by the corner trowel. An additional step, would be to follow up the next day, with an 8", to blend (skim) it further into the wall.
If Thomas want to spend a lot of time, teaching yourself, the precise amount of mud, and the precise amount of pressure, needed to accomplish his goal - without a good corner trowel - more power to do work - but that's what it will be, a lot of time. Drywall finesse, is really difficult to explain/teach, in a text environment, and even YouTube videos fall short. The brand/type of tools used, consistency and type of mud used, and even the temperature and humidity, of the room being finished - all tug and pull, at what makes sense, in his hand today, but might not be the case tomorrow.
While the mud is still wet, any knife stroke will slide the tape if not enough squeezing force is applied. What this squeezing does is press the excess mud from behind the tape; the less wet mud, the more friction between the tape and the drywall facing, and the less sliding/wrinkling is possible.
Many people have never used a corner trowel for taping, and I think that it might be the reason you're wrinkling the tape. It might not be squeezing enough mud from behind the tape.
To squeeze the tape with the least amount of possible damage to it, place one 6" knife corner in the inside corner, tilt the blade 45 degrees or more toward the direction you're pulling it, then apply enough pressure while drawing the knife that the mud squeezes almost completely out from behind the tape, taking care not to tear the corner crease with the knife corner. Then repeat on the perpendicular side of the corner.
My method once the mud is up is to apply the tape lightly over the whole length, then draw the knife upward over the top couple feet, holding it in place with my free hand. Then once the top couple feet is good and tight, I step off the ladder and finish by stroking downward the rest of the way: the top couple feet is stuck hard enough that the tape won't slide.
How Should Diagonal Ceilings' Inside Corners be Muddied?
In preparation for taping and mud the 'inside corners' of a diagonal attic ceiling, we are planning to reattach the short walls to the ceiling. What would be the best method for achieving a straight line? Is there a special tool we can use? Free-handing is not working for us. Our 90-degrees trowel works fine for vertical inside corners, but of course the 'corners' we are trying to do are horizontal.
I've had decent luck not taping inside corners at all. Instead of I've use a sanded caulk. The key is to have a nice sharp edge to work with where the two pieces of sheetrock meet. But if you want to mud and tape, there are tools for that - K Brand Corner Trowel.
Corners can be one of the hardest and most frustrating areas to plaster which means you need to make life easier and save yourself precious time with a corner trowel. A plastering tool that’s specially designed for this purpose. Like all our tools here at G.SB, our corner trowels have been handpicked by our expert team who have years of experience in plastering and have used these tools themselves.
One of the main benefits of a corner trowel is that you don’t have to go over the same spot over and over again, which can not only take time, this also poses a high risk of repetitive strain injuries. As we handpick and test all our plastering tools, we’re always on the look-out for attention to detail. Features such as soft-grip ergonomic handles offer comfort and make tricky jobs easier and more enjoyable. Choose from our top brands.
We also offer both plastic and stainless-steel corner plastering trowels. Stainless steel is a traditional material that professionals rely on time and times again for durability, while plastic offers flexibility – perfect if you’re after a corner trowel for DIY or are a newbie learning tricks of the trade.
We offer a range of tools for corner work, including the standard internal and external corner trowels, which it is meaning they are rust free. We also have an adjustable angle corner trowel that allows for use on a variety of splayed internal angles, which can be easily adjusted by the loosening of a wing nut
The adjustable square and angle tool is ideal for use on reveals and window frames. Both the adjustable angle corner trowel and square and angle tool are manufactured from stainless steel meaning they are rust free.
Everything a plasterer in the trade needs to operate day to day. Each tool has been crafted to benefit the user and leave a seamless finish. From scratch tools, to spatulas and bucket trowels, G.SB provides it all. All tools are made from stainless steel and most are available in a variety of different sizes. Everything you need from one brand.
Tools for Finishing Drywall
Once the grunt work of lifting and fastening drywall is done, the finer (and messier) work of finishing begins. The equipment you need for this stage includes basic tools for mixing, taping, finishing ("Drywall Corner Mudding/ Corner Mudding Tools") and sanding. Only four tools for finishing are absolutely essential: a mud pan, two drywall knives and a sander. But a few others can help the job go more smoothly, quickly and cleanly.
Corner trowels smooth both sides of an inside corner at the same time. This is an optional tool but can be worth it when there are a lot of inside corners to tackle. The alternative is using standard taping and finishing knives to finish each side of the corner separately; and it can be tricky to smooth one side of the corner without scraping the edge of the knife onto the adjacent side.
After installing drywall panels, you shouldn’t leave the seams open. To achieve an elegant, attractive look, you need to cover the seams. Fortunately, that is a quick and easy task with the best drywall taping tools. Corner trowels help you cover the gaps and achieve a nice continuous finish free of jags. When they are versatile, these machines do more than just covering the gaps. In case there are cracks or holes on your drywall, the tools will fix them.
Best Drywall Corner Tools 2022
How To Choose The Best Putty Knife for Corners
Does the thought of finding a great Putty Knife (''Corner Putty Knife'') for Corners stress you out? Has your mind been juggling between choices when it comes to buying Putty Knife for Corners in general, specifically regarding which model to choose? If that’s the case, know that you’re not alone. Many people find it tough to buy the perfect Putty Knife for Corners for themselves. We understand the stress associated with the buying process!
The real fact is, today’s consumers or buyers or shoppers have enough challenge to choose Best Drywall Knife from many products, brands and models, leaving them with a bad decision making or even a frustration. The result would be, the majority of buyers experience shopping frustration, make easy and quick decisions or make the “No-choice” option, choosing to defer a purchase decision.
When a lot of buyers decide to purchase Best Drywall Corner Tools, it becomes a problem to them, shoppers are searching for ideas to help them, choose and decide for the perfect Best Drywall Corner Tools product to purchase.
Since you've reached this page, you must be curious about the Putty Knife for Corners. You’ve been bombarded with information, so you need to find a reputable source with credible options before you make any decisions on which product would be best for your needs.
There are many sources that’ll provide you with that information- buying guides or ratings websites, word-of-mouth testimonials from friends or family members, online forums where users share their personal experiences, product reviews specifically found all over the internet, Tiktok, and YouTube channels. Only thorough research will ensure that you get the right product. But that’s not always easy, right? How I did we create this buying guide?
First, our algorithms collected as much information available about these products from trusted sources. We employed both Artificial Intelligence and large data volume to validate all collected information. Then our AI ranked them on their quality-to-price ratio using industry-standard criteria that let us pick the best Putty Knife for Corners currently on the market! The products aren’t chosen randomly. We consider several criteria before assembling a list.
Some of the criteria are discussed below:
Brand Value: What happens when you go for a not-so-reputable brand just because the price seems cheap? Well, the chance of getting a short-lasting product goes higher. That’s because the renowned brands have a reputation to maintain, others don’t.
Features: You don’t need heaps of features, but useful ones. We look at the features that matter and choose the top Putty Knife for Corners based on that.
Specifications: Numbers always help you measure the quality of a product in a quantitative way. We try to find products of higher specifications, but with the right balance.
Customer Ratings: The hundreds of customers using the Putty Knife for Corners before you won’t say wrong, would they? Better ratings mean better service experienced by a good number of people.
Customer: Like ratings, customer reviews give you actual and trustworthy information, coming from real-world consumers about the Putty Knife for Corners they used.
Seller Rank: Now, this is interesting! You don’t just need a good Putty Knife for corners, you need a product that is trendy and growing in sales. It serves two objectives. Firstly, the growing number of users indicates the product is good. Secondly, the manufacturers will hopefully provide better quality and after-sales service because of that growing number.
Value for the Money: They say you get what you pay for. Cheap isn’t always good. But that doesn’t mean splashing tons of money on a flashy but underserving product is good either. We try to measure how much value for the money you can get from your Putty Knife for Corners before putting them on the list.
Durability: Durability and reliability go hand to hand. A robust and durable Putty Knife for Corners will serve you for months and years to come.
Availability: Products come and go, new products take the place of the old ones. Probably some new features were added, some necessary modifications were done. What’s the point of using a supposedly good Putty Knife for Corners if that’s no longer continued by the manufacturer? We try to feature products that are up-to-date and sold by at least one reliable seller, if not several.
After installing drywall panels, you shouldn’t leave the seams open. To achieve an elegant, attractive look, you need to cover the seams. Fortunately, that is a quick and easy task with the best drywall taping tools. Drywall Corner Tools help you cover the gaps and achieve a nice continuous finish free of jags. When they are versatile, these tools do more than just covering the gaps. In case there are cracks or holes on your drywall, which it will fix them.
What is the best tool for smoothing and finishing the mud on the edges and corners? Ditch the knives and trowels. Please, allow me to introduce to you the K Brand Inside Corner Knife. This tool is optimally designed for edge and corner finishing.
First of all, the knife is made of flexible stainless steel. Hence, it is strong enough to resist breaking, and yet, it adjusts appropriately to provide a smooth and accurate finish.
A lot of finishing knives out there end up rusting and becoming totally useless. But things are different with this unit. Since it is crafted from stainless steel, it doesn’t get corroded. It stays useful for many years.
Another wonderful fact about the tool is how easy it is to use. The handle is just the right size for anyone’s palm. Plus, it is rubberized, and thus comfortable to hold. You won’t get fatigued easily while using this finishing knife.
If you want a knife for smoothing the inside drywall corners, the K Brand Knife will come in helpful. Apart from its great quality and feel, the tool is affordable.
Prominent Features:
Made of stainless steel and hence durable
Strong but flexible – provides a smooth finish
It is resistant to corrosion
Comes in More than two sizes
We Select High-Quality corner trowel and outside corner Products for You to Choose in G.SB. Buy corner trowel and outside corner products and choose a well-known brand. It’s important to buy from a branded seller because it will be easier to get your corner trowel and outside corner products fixed or replaced if they have problems. You’ll also get better warranties and higher-quality goods from these sellers.
You want the best corner trowel and outside corner products and you want to be sure that what you buy is from a reputable seller. You need to know whether or not this product is going to work for your needs, but most importantly, you want to feel confident about who you are buying from.
What is the reasonable price to buy a corner trowel and outside corner product? This question can be answered in many different ways depending on your perspective.
A customer might want to know the best deal they can get, whereas an employee of the store would be more concerned with what price will make their money. The answer varies for both parties and there are many factors that contribute to this decision.
When shopping for corner trowel and outside corner products, use these tips to know how much is reasonable:
1- Know your budget and stick to it. If you don’t have enough money saved up or are living paycheck-to-paycheck, this will be difficult. Consider saving up more so that you can get the things that are important to you at an affordable price.
2 - Compare prices in different stores before buying anything if possible because some stores might be cheaper on certain items than others.
3 - Remember that sales tax is not included in posted prices (unless otherwise noted) so always calculate taxes into your cost when comparing one item vs another.
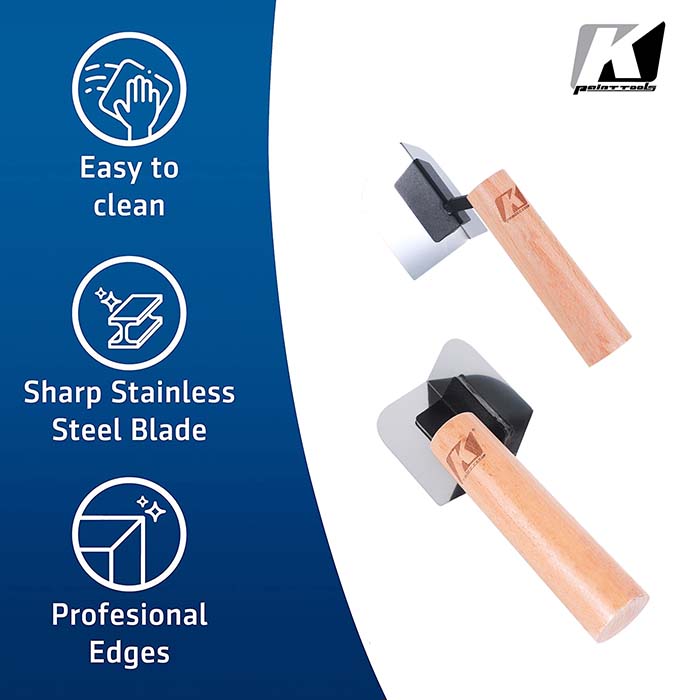
K Brand Inside Corner Trowel Best Corner Drywall Tool Made of Stainless Steel with Internal Angled and Hand Tool with Wooden Handle
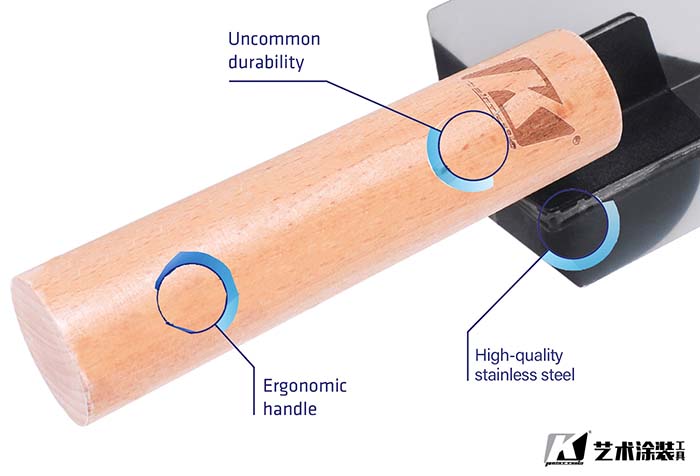
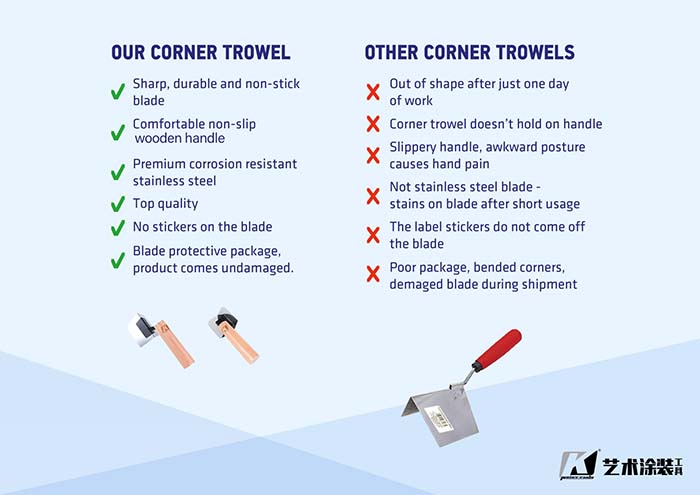
PREMIUM DURABILITY TOOL – The blade of corner trowel is made of highest quality solid, corrosion resistant top notch Italian stainless steel. Our tapered internal and external corner trowels stand out from the rest due to uncommon durability – the blade is made out of polished, tapered steel which is attached to the handle by forging. The other corner trowels are assembled by multi-spot welding.
PERFECT FOR CORNER FINISHING – Our premium quality internal and external corner trowels are perfectly used for shaping concrete around internal or external corners. Anti-slip handle is located at the center of a 90-degree bend in the blade for balance and the ability to apply even pressure to both sides of a corner. K Brand corner trowel will help you finish the job faster, leaving better results in the end. It will also leave you with fewer aches and pains afterwards.
ANTI-SLIP WOODEN GRIPS – Ergonomic, anti-slip wooden grips provide exceptional comfort of use. We designed our internal and external corner trowels with taking special care to ergonomics of a grip. We wanted to make sure that your wrists are safe even if you work for a long time. Top quality materials of our corner trowels with new comfortable grip ensures a long-lasting usage. Each tool is branded- this is our guarantee that every piece was carefully tested.
INNOVATIVE TECHNOLOGIES APPLIED – Our internal and external corner trowels are unbreakable. Forged connection between the handle and the blade makes us sure of the durability of our corner trowels. Due to constant investments in innovative manufacturing technologies. we still increase our production effectiveness. During production process we went through all stages of production: designing, injecting plastic elements, cutting and bending metal parts, coating and assembly of final corner trowels.
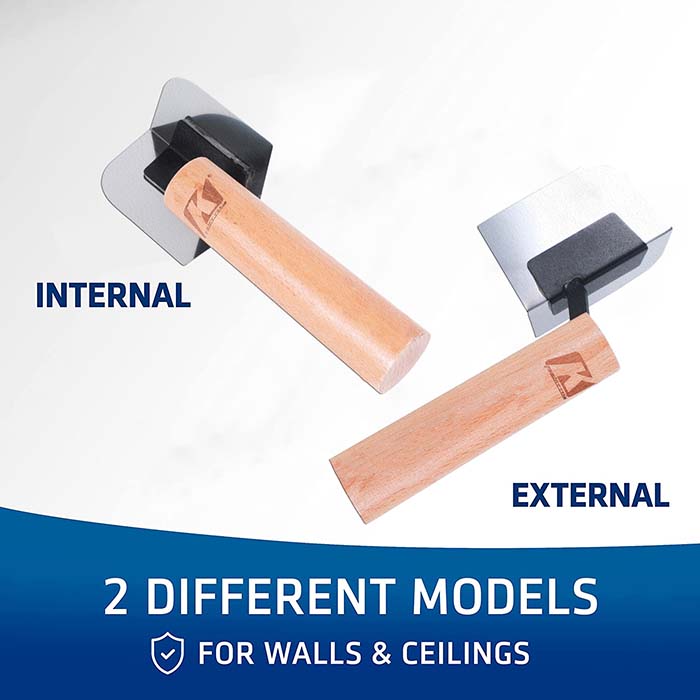
SUITABLE FOR INTERNAL AND EXTERNAL CORNERS – Our angled corner trowels are in application of plaster on corners. Our corner trowels are tools for creating a perfect 90- degrees angle and perfect corners.
Tips: Improving Your Inside Drywall Corners
Drywall ending is an underappreciated art. Like so many different grand ironies in life, the best job will go unnoticed. However, humans will pay a lot of interest to a poorly achieved job. Pops, over-standing, messy outlet gap cuts, and bubbled seams all stick out like a sore thumb. Even if you've mastered the finer components of drywall finishing, interior corners can nevertheless be a challenge.
If your tape rips or you haven't feathered your mud properly, your wall will seem to be uneven (because it is). Conversely, sharp internal corners surprise you if the finisher is aware of some type of voodoo. It takes a lot of exercise to get it proper the first time. But our Pros have some pointers for enhancing your internal drywall corners.
However, don't simply slope it on. Too much mud receives in the way of reaching sharp interior drywall corners. The purpose of the drywall ending is to disguise the seams and create clean, sharp corners. So, err on the facet of the usage of much less mud. Plus, greater mud simply makes the job harder, as you'll wind up having to sand it off later. Practice till you get to that Goldilocks-Level of mud-spreading proficiency.
Also, consider using a thinner mud. Novices who have trouble with sharp corners often find that thinner mud is the answer. This especially holds true for the final or skim coat. Remember, our goal is so simply that conceal the seams and adhere the tape. You are not building a mud hut here. Cut the mud with some water for the desired thinner consistency.
We are considering ditching the corner trowel with a flat putty knife. Then feather one side of your inside drywall corners at a time. There's no shortage of ridicule for the corner trowel in professional circles. Of course, if a finisher gets the job done efficiently with a corner knife, then that's the right way to do it. But many Pros think the job is best done with a straight knife on one side.
New technology is changing with each passing day. Automatic monitoring equipment can observe tape and the exceptional quantity of mud simultaneously. Then, a nook curler is used to make a sharp nook sooner than a mud flusher feathers the edges. Of course, the equipment is more highly-priced than common drywall hand tools. But if you've ever realized a proficient-crew use them, you will in all likelihood choose to end the phase of a skilled crew. It makes the job a good deal that more-quicker.
As with most jobs, there are quite a several opinions about how to enhance and get the best exterior drywall corners. There are probably many gurus who do remarkable work with nook trowels, as properly as being truly beneficial with the hand mud. In the end, exercise makes perfect. But, if you're straining in this vicinity properly now, think about these suggestions for enhancing your internal drywall corners.
Stainless steel trowels, plastic plastering trowels and more!
A plastering trowel is arguably the most vital tool in any plasterers tool kit. It is used for the scooping and spreading of plaster and a plastering job simply won't be able to be complete without it. So, are you looking for a high-quality plastering trowel? Well, look no further!
Our wide selection of plastering trowels in our plastering tools range includes plastering finishing trowels, flat trowels, corner trowels, margin trowels, bucket trowels and plastering trowel sets, either in stainless steel or plastic. At G.SB we understand that you need durable, high-quality trowels to complete the job effectively.
All the trowels in the range are made of flexible plastic or stainless steel to provide a quick and simple application with a smooth finish. The sturdy handle on each of our plastering trowels ensures a secure grip during use so all your plastering jobs can be completed with ease. Plus, with the vast array of different shapes and sized trowels in the collection, we are sure you will find the best plastering trowel for your needs whether it be a large bucket trowel or a smaller corner trowel! If it's a selection of different trowel types you are after, then why not check out our plastering trowel sets!
We believe that buying a trowel needn't be complicated, so to help you find the best plastering trowel for your needs we've answered some frequently asked questions below to get you started...
What plastering trowel do I need?
Choosing the right trowel for the job can make or break for the final finish. We suggest you size up the area you will be plastering - for example, if you are plastering a large space then you'll benefit from a larger plastering trowel or if you are likely to be plastering corners than you'll need a corner trowel to finish the job. A trowel which is too big will not bode well on walls with uneven surfaces or features while a small plastering trowel can make a larger job take a lot longer than it should.
Should I buy a stainless steel trowel or plastic plastering trowel?
Plastic trowels are specifically designed to give an amazing finish, however, should not be a replacement for steel trowels. Arguably, stainless steel trowels remain the best trowel for applying the first few coats of plaster so we recommend every plasterer's tool kit includes a stainless steel trowel. Plastic plastering trowels are a fantastic addition if you are looking for a top-quality finish.


